Friday, July 8, 2016

How to Remove Tar from Shoes

I don't know about you, but I can't stand it when annoying things like getting tar on the bottom of your brand new tennis shoes happens.  These are small, first-world problems, but they still manage to make me crabby.  

While Adam and I were walking around a park, I managed to get a glob of tar stuck on the bottom of my brand new tennis shoes.  Grrrr....  After digging out what I could with a stick, I decided I would forget about it and deal with it later.  

When we got home, I did some quick research to see if anyone else had figured out how to remove tar from the bottom of shoes.  Believe it or not, WD-40 kept coming up as a solution!  We had a few cans of it in our garage, so I decided to give it a go.  I also grabbed an old toothbrush and some paper towels.  


All I did was squirt some WD-40 over the tar and let it sit for awhile.  It soaked into the tar and started loosening it up.    


While the WD-40 was doing its thing, I looked over my shoulder and noticed Jazzy staring very intently at one of the chairs on our porch. 


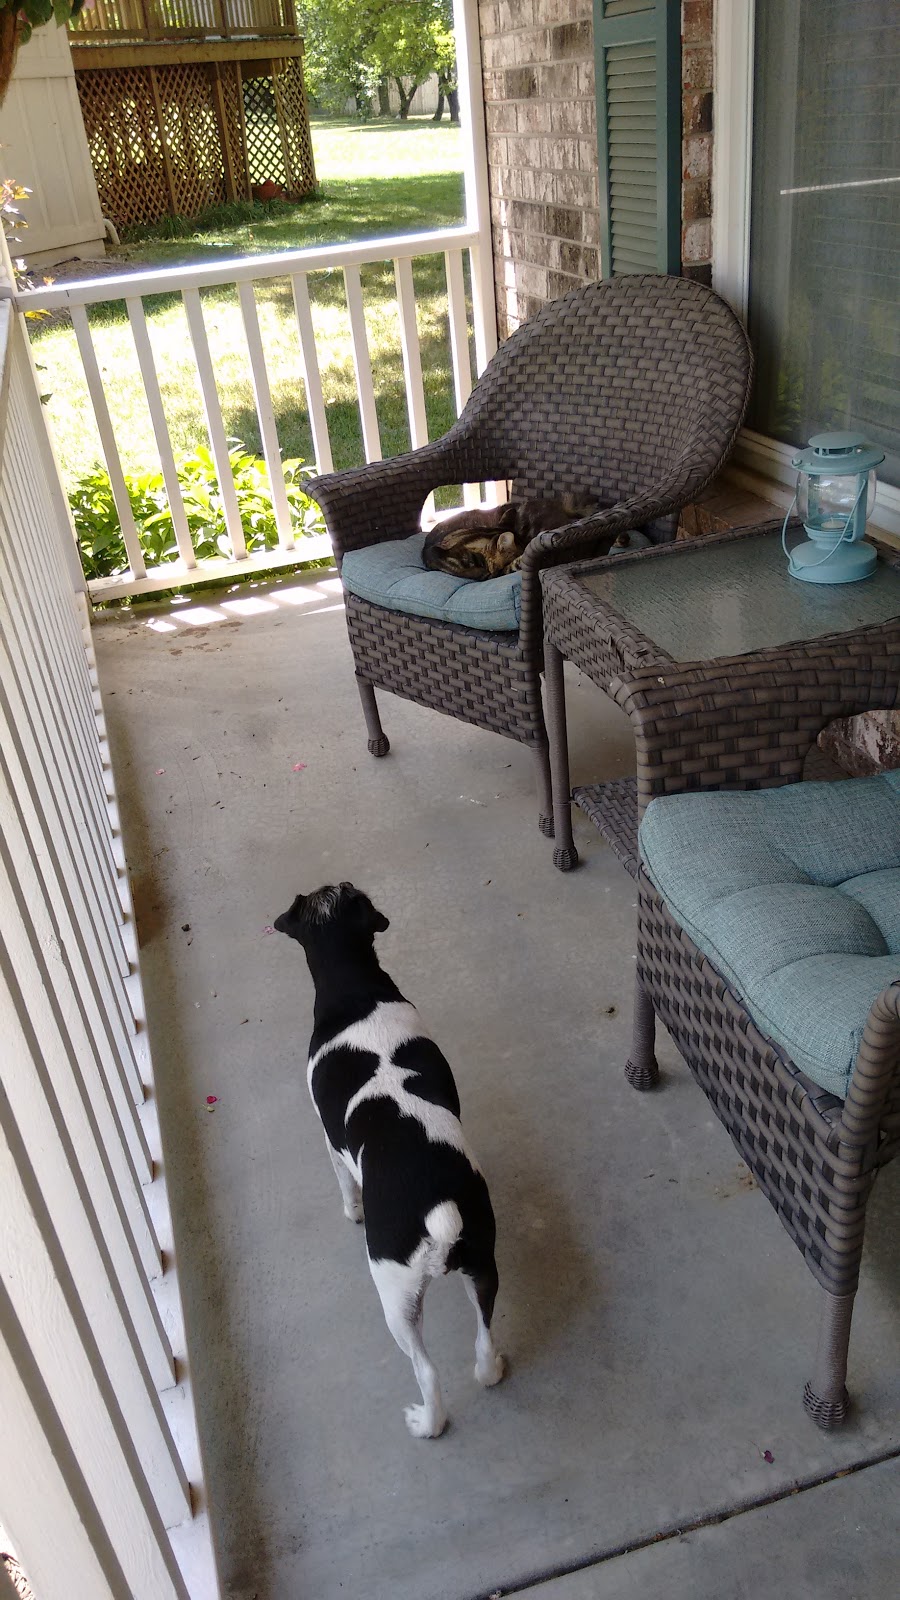
There was a cat laying on the chair and I hadn't even noticed.  Jazzy sure took notice.  I was surprised that she didn't bark at it or go after it, seeing as how she starts growling at most dogs she meets.  She just seemed curious.


The cat couldn't have cared less about Jazzy.  The two of them got along very well.  I have no idea where the cat came from or who it belongs to.  I did give it some water and some of Jazzy's food.  I haven't seen it around since, so I guess it went home.  I'm sure Jazzy would love for it to visit again since they got along so well.

Anyways, back to the tar-removing endeavor.  After the WD-40 soaked the tar for about 5 to 10 minutes, I scraped off what I could with the old toothbrush.  Then, I spritzed on some more WD-40 and used paper towels to get off the rest.  


It worked surprisingly well!  Now I don't have to worry about getting tar wherever I step.  Who knew WD-40 had so many uses?


Wednesday, July 6, 2016

Hello!

Not too long ago, I gushed about our new front door.  I am even more in love with it now that it's painted a cheery, happy blue!  


I decided to go with the color Blue Bicycle by Valspar.  I adore this color!  It is definitely pretty bold and bright.  But a front door is the perfect place to try out such a fun color.

Our fiberglass front door came primed white from the factory.  We could have paid $400 PER SIDE to have it painted at the factory.  I said a big, whopping "NO!" to that!  I could handle a little painting without the $400 price tag.  

After doing a little research, I decided to follow this tutorial pretty closely.  I bought the recommended Valspar Duramax exterior paint in a semi-gloss finish.  It worked like a charm!  I did not do the sanding or deglossing step since the door came already primed.  I ended up doing two coats on eat side and then touched up a few spots here and there.  


I decided to paint both sides of the front door so I could enjoy the fun color while I was inside or outside. The blue works with the entryway and visible dining room.  It definitely brightens up our doorway!  To add some more fun charm, I hung this "Hello" sign above the door I found on sale at Hobby Lobby and added a new coordinating rug I found at Tuesday Morning.  On a side note, have you ever been to Tuesday Morning? It's very similar to Home Goods.  They have discounted home decor items.  I always forget to go there when trying to find things for my home, but am always happy when I remember to go since I can usually find some good deals.

I also added a new outdoor rug that I found on clearance at Target.  It ties in nicely with the door and also with the pots that house my elephant ear plants.   


After spending so much time and effort painting the door, I didn't want to put a nail in it to hang my wreaths from like I did in our previous front door.  So, I opted for a metal Command hook in an oil-rubbed bronze finish to match the door hardware.   


This was such a cheap, easy project!  For the cost of a quart of paint, I now have a front door that makes me smile whether I'm coming or going!  


Tuesday, July 5, 2016

My Favorite Plant

I love plants and flowers and gardens even though I do not have a green thumb.  I am getting better at keeping things alive, but still have a ways to go.  One plant I am able to make thrive are elephant ears.  


My love of elephant ears started about 4 years ago.  One of my co-workers gave me some elephant ear bulbs.  I asked her lots of questions about how to plant them and take care of them.  She very patiently gave me explicit directions and I am happy to report that I still re-plant the same bulbs every year in pots.  

I love their large-scaled leaves and how tropical they look.  They always make me think of summer when I see them.  They are also pretty easy to take care of, surprisingly.  I simply plant the bulbs in potting soil in late May or early June.  I add a little Miracle Grow Plant Food when I plant them to help get them started.  Then I just keep them watered.  That's all there is to it!  


Pretty soon, I end up with lots of leafy goodness!  I have pots in both full sun and part sun.  The elephant ears seem to do just fine with either full or part sun, though the ones that get full sun do get bigger.  


I also like to trim some leaves and bring them inside to make my home feel like a tropical paradise.  Okay, that might be stretching it a bit, but it does make it more fun inside. 


In order to be able to replant them each year, it's important to keep a few things in mind.  When summer ends and before the first freeze, you have to cut off the leaves, remove the bulbs from the dirt and store them in a cool (but not freezing), dark place over the winter.  I keep mine in an empty pot in a closet in our garage.  A basement would also be a good option.

If you are looking for an easy plant to try out, look into elephant ears!