I thought I'd share the process we went through to build our planter box in case you'd like to whip one up on your own. It was a relatively simple project and didn't take too much time.
Step One: Decide on the Size and Location of Your Planter Box
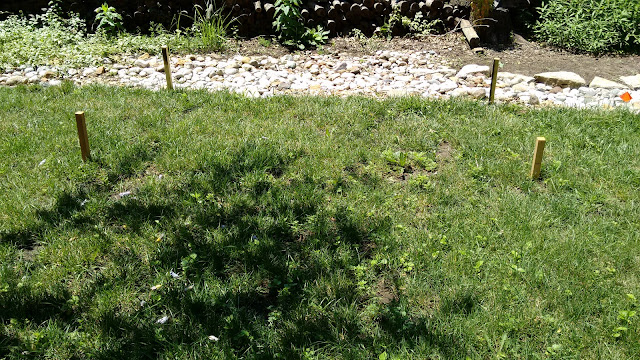
The first thing you'll want to do is to decide where you want your planter box to go. Think about what you plan to plant and then determine the best position. Since we planned to plant herbs, we picked an area that would get full sun for the majority of the day. We used some stakes to help us get a sense of what size we wanted to make ours. We decided to go with an 8-foot by 4-foot box.
Step Two: Gather Your Supplies
Once you know where you'll be putting your planter box, you'll want to gather the supplies you'll need to build your planter box.
Here's what you'll need to make an 8-foot by 4-foot planter box:
- Four 8-foot cedar* 2x6's
- Four 4-foot cedar* 2x6's
- Four 4-foot cedar* 2x4's
- Four cedar* stakes
- Cedar* corner pieces (optional)
- Wood glue
- Deck screws
- Drill(s)
- Clamps
- Mallet
- Garden soil/compost
- Herbs
*Make sure you get untreated lumber if you plan to plant vegetables or herbs. You don't want any chemicals leaching into anything you might eat.
Step Three: Attach the Framework of the Planter Box
Our planter box consists of two frames stacked on top of each other. So, we assembled each frame separately. We laid everything out ahead of time so we had an idea of what the finished frame would look like and to make sure all of our cuts were accurate. We used two 8-foot cedar 2x6's for the long sides and two 4-foot cedar 2x6's for the short sides. For some extra stability, we added two 4-foot cedar 2x4's in the middle of the frame.
Adam has some handy assembly squares that we used to make sure the corners were 90 degrees. We used clamps to hold the wood against the squares. Making sure everything lines up will ensure the finished product looks its best. Don't be tempted to skip this step, like I was. If we had, the planter box probably would have ended up all wonky. Good thing Adam was around to make sure we didn't miss this step.
Now, undo all the clamps. I know this seems counter-intuitive, but you'll have to undo the clamps so you can use wood glue to help keep all the wood together for the long haul. You could step the glue step and just use screws, but we didn't want this moving or shifting over time. So we glued together the outside frame for some added strength. We stuck a little piece of foil under the area we were gluing so the glue wouldn't adhere our frame to our wood deck.
After you glue the outside frame together, put the clamps back on the frame. These will help hold the wood steady when you screw the pieces together. You'll want to add three screws to each corner, as shown below. We pre-drilled the holes to help prevent any splitting. It's super handy if you have two drills for this step. I pre-drilled the holes and Adam followed behind to put in the screws.
After we got the outside frame all assembled, we added two 4-foot cedar 2x4's to the center. These act as extra bracing and help keep the outside frame a perfect rectangle. We opted to just screw in these boards and skip the gluing step.
Jazzy did a fantastic job supervising us. She was kind of a perfectionist, though. She was not very happy that we skipped the wood glue on the center braces.
Now you get to repeat the process with the second frame. It will go a bit quicker since you know what you're doing now.
Step Four: Prepare Your Yard for the Planter Box
Once your frames are built, you'll want to prepare your yard for the planter box. We were putting our planter box on a slope, so we (really, it was just Adam) had to dig out some of the yard to ensure that it would be level. You want your planter box to be level so the water drains properly. You'll also want to remove any grass or weeds from the area since there is no bottom.
Next, you get to put the frames in their new location. We stacked the two frames on top of each other. You might notice some cedar corner pieces in the photo below. Adam had some extra cedar pieces, so he cut a 45 degree angle on each side and attached them to the corners with screws. This is just one more step you can take to help keep the frames stable, but isn't necessary. If you can't tell by now, Jazzy learned her perfectionism from her daddy.
Step Five: Secure the Planter Box to the Ground
Now you'll want to make sure your planter box doesn't move around on you. To do this, beat down some cedar stakes to the inside corner of the frames with a mallet. Keep on hitting them until they are flush with the frame.
Once the stakes are flush, attach the frame to the stake with screws. You'll want to screw both the top frame and the bottom frame to the stake. This will ensure the frames stay not only together, but in their location.
Step Six: Fill in Your Planter Box with Soil/Compost
It's time to fill in your planter box now! Adam did some very complicated math involving cubic feet to determine how many bags of soil and compost we would need. I'm not quite sure how he figured it out, but I'm glad he knew what he was doing! We ended up using a mix of Vigoro Organic Garden Soil and Miracle-Gro Nature's Care Organic Raised Bed Soil.
Step Seven: Plant What You Like!
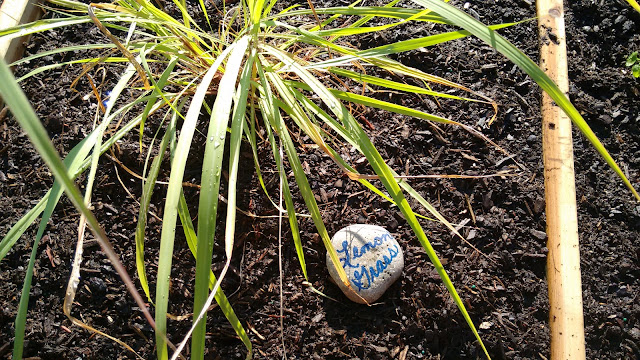
Here comes the fun part- planting your plants! We struck out at Home Depot when looking for herbs. They didn't have hardly any herbs left. But we found some at a local nursery. We planted some lemon grass to help keep the mosquitoes away. We also planted some basil, cilantro, chocolate mint and mojito mint.
Step Eight: Add Plant Markers
I used my handy trick for labeling what I planted. All you need is a few flat rocks, a paint pen and some clear protective spray paint.
Now you can sit back and wait for your herbs to grow! Even though it's late in the growing season for Missouri, I think we'll still be able to enjoy some fresh herbs in no time.
Good luck if you plan to make a planter box of your own!


No comments:
Post a Comment
I welcome your thoughts!