I spent last night making keychains and I'm not afraid to admit I had a blast. Who doesn't love doing crafts? It also helped me solve an organizational problem. You see, I had this bin of keys in my junk drawer. The keys were just randomly thrown in there and I still have no idea what two of the keys even go to.
While perusing Pinterest, I came across this tutorial for making keychains out of clay. The keychains looked super simple to make and they also looked super cute! I followed the tutorial pretty closely, but did make a few tweaks.
So, I headed to Hobby Lobby to purchase the supplies I needed and gathered up the rest at home. Here's what you need to replicate this project:

-Fimo polymer clay
-Keyrings
-Jump rings
-Clay cutters (optional)
-Parchment paper
-Toothpick
-Baking sheet
-Rolling pin
I had never worked with polymer clay before and it was a bit more difficult than I thought it would be. It was kinda crumbly and hard. I'm not sure if I got a bad batch or if that's just how it is. I had to really work it in my hands to make it pliable enough to roll out.
Once I got it rolled into a ball, I put the ball on parchment paper and used a rolling pin to flatten it out. But it started to stick to the rolling pin. (It's a good thing I've only used our rolling pin for projects, like helping the beadboard adhere to the wall in our half bathroom redo, instead of for cooking. Because it now has sparkly green clay on it.) So, I made a tutorial tweak. I put the ball of clay in between the parchment paper so it wouldn't continue to stick to the rolling pin.

Then I proceeded to continue rolling out the clay. Let me tell you, it wasn't easy. It wasn't so much rolling as putting all my weight on top of the rolling pin, on top of the ball of clay and pressing down really, really hard. It wasn't exactly the quick process the tutorial promised.
Once I finally got a section rolled out, I used the clay cutter to cut out a circle shape. You don't have to buy the clay cutters. You could use a butter knife to hand-cut the shapes. Or find something around the house you could turn into a cutter, like a small lid or cap.
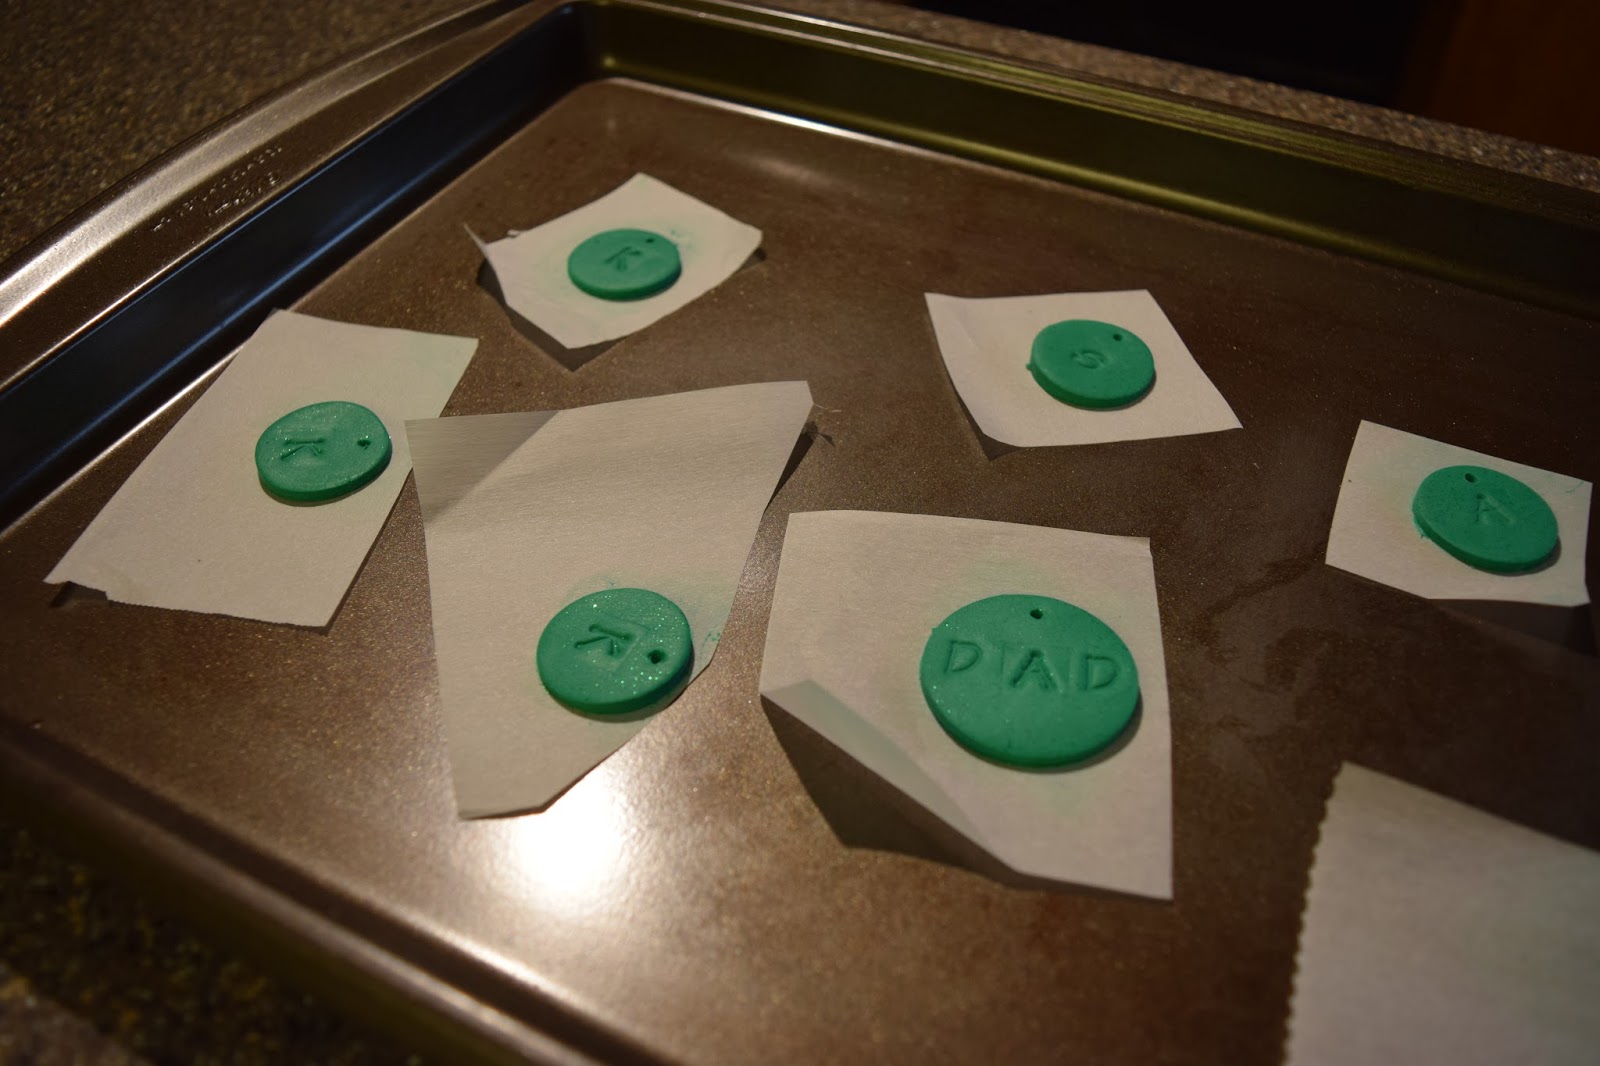
Once I had my shapes cut out, I used some rubber stamps I already had on hand to put letters on the shapes. I went with a "K" for our extra house key since our last name starts with "K." I made an "A" and an "S" for our (Adam & Sara) extra car keys. We have a set of keys to Adam's dad's house, so I made a bigger shape and stamped "DAD" on it.

Then you'll want to use a toothpick to put a hole near the top to allow for the jump rings, which hook onto the key ring. Just stick the toothpick in and wiggle it around a little until your hole is big enough.
After that, put the clay on top of parchment paper onto a baking sheet. Then bake the clay according to the directions on the package. The clay I used specified a baking time of 30 minutes at 230 degrees.
Once 30 minutes had passed, I took them out of the oven. They still seemed a bit soft in the center, so I put them back in for 10 more minutes. After 10 minutes, I checked them again and they still seemed like you could easily bend them. So, I consulted Google and it told me that the clay will fully harden after it's been completely cooled. So, I decided to let them sit overnight before moving onto the final step.

On a side note, I had no idea my oven was so dirty! I will have to find a cleaning solution on Pinterest...
Anyways, the next day, the clay had hardened up nicely. The final step was to use the pliers to open up the jump rings, slip them into the holes on the keychains, add the key ring and them close them up.
Finally, you can add your keys. They turned out pretty cute and helped me organize all those extra keys I had lying around. But seriously, who can't use a glittery green keychain?

All in all, I'd say this was a successful Pinterest Project! Here's my review of the Pinterest Project:
-Tutorial: B
The tutorial was very easy to follow and the pictures definitely helped illustrate the steps. It was a bit deceiving on just how much time it really takes, but was still a relatively short amount of time.
-Level of Difficulty: A-
Even though it took longer than I thought it would, it wasn't anything too difficult. The hardest part was working with the clay. And that just might have been because I'm a newbie at it.
-Finished Project: A+
I love how the keychains turned out! They seem like they will hold up well and are adorable.
No comments:
Post a Comment
I welcome your thoughts!