Thursday, December 15, 2016

Jazzy's 2nd Gotcha Day

Adam and I just celebrated Jazzy's 2nd Gotcha Day!  We are so incredibly lucky that she is a part of our lives and we wanted to make sure she felt extra special on her Gotcha Day!  

Her 2nd Gotcha Day was a little more low key than her 1st Gotcha Day, but I think Jazzy still enjoyed herself.  We spent the evening by playing all sorts of games and giving her some of her favorite treats.  I tried to get her to pose for a photo in front of the tree, but she was far too enamored of the treats that Adam was holding.    


But she still managed to look awfully cute.  


After we gave up trying to get a photo of Jazzy looking at the camera, we moved on to some games. Jazzy loves to spend time playing games with us, especially if we get down on the floor with her.  

We played get the treat out of the sock...


...and even practiced her newest trick: jumping.  Jazzy has been working on her jumps and let me tell you, she is a jumping fool!  The girl is meant to jump.  Check out this adorable slow-motion video Adam took of Jazzy:


Jazzy sure had a fun time, but was worn out by the end of the evening.    


We love you, Jazzy!

Thursday, December 1, 2016

Bring on the Christmas Decorations!

One of the things I continue to love about the holiday season is adding Christmas decorations to my home. Having Christmas decor around the house just makes things seem more cozy. 

The outside of our house and much of the inside looks like it did last year.  I did add a few new touches to our home this year.  I went with the traditional red and green colors.  

Our sofa table has a green theme going on.  I added a pretty green glass bowl, a stack of green books and a sprig of garland in a glass bottle.  What I love most about these items is that they came from my family members!  My mom got me the green glass bowl.  The books came from Adam and my grandma.  And my dad gave me the glass bottle.  It's very sweet to glance at my sofa table and be reminded of all the people I love.     


To contrast the green, I added some hints of red to the living room, as well.  


Jazzy is especially fond of her red Christmas blanket.  Look at her all snuggled up!    


There's also some tinges of red in my dining room.  The red candle on the table picks up the red ribbon on the Twelve Days of Christmas ornaments on the little tree perched on the shelf.  


And my half bathroom needed some holiday cheer, too.  A simple red tea light holder and a red hand towel is all it took to make the small space feel more festive.  


I hope your holiday decorating is bringing you as much cheer as mine has brought me!  

Wednesday, November 30, 2016

The Holidays Are Hard

I am one of those people who always loved holidays.  I loved holidays of all kind and couldn't wait until the next one came around.  But ever since Adam and I lost our baby, many of the holidays have become bittersweet.

I found out I was pregnant on Valentine's Day in 2012.  I was so excited to tell Adam about it!  I wrapped up the positive pregnancy test in a little gift bag and gave it to him right before we went out to eat.  Now every year that Valentine's Day rolls around, both Adam and I are reminded of the fact that we never got to meet our baby.  While we try to focus on our love for each other on Valentine's Day, we can't help but feel sadness about losing our baby.  

Our due date was close to Halloween.  So now Halloween serves as yet another reminder that we lost our baby.  It doesn't help that Halloween is all about cute kids dressing up.  Adam always comes home bummed on the day in October when his work hosts all the employees' kids for trick or treating around the office.  

Christmas is rough, too.  It seems that one family member or another is always pregnant or recently had a baby.  Seeing all our cousins around our age with their growing families at family gatherings is just plain hard.  It's not that we're not happy for them or that we don't wish them all the absolute best in life.  They simply serve as reminders that we don't have the one thing we want more than anything.  

It makes it more difficult because we feel pressure to feel happy about the holidays and family gatherings. Sometimes I feel like I should have won an Oscar by now for some of the acting I have had to do.  

And after feeling sorry for ourselves, it inevitably leads to guilt.  We have so many things in our lives to be thankful for: each other, our health, our jobs, our home, our sweet Jazzy and the list goes on.  We feel guilty that we can't seem to focus on all those wonderful parts of our lives.  

But you know what?  All those feelings are normal.  Even though it feels like we're alone in feeling them sometimes, I know there are other people who feel the exact same way.  My goal in writing this post is not to be a Debbie Downer or take away anyone's holiday cheer.  I simply want to shed some light on the topic and let anyone struggling know they are not the only ones.

I wish those struggling with infertility this holiday season loads of hope!  Hope for getting through the low points of the season.  Hope for reaching out and asking for help if you need it.  And hope for happier holidays in the future.  


Tuesday, November 29, 2016

Sprucing Up My Bookcase

I'm a little ashamed to admit that it has taken me years to accomplish this project.  The sad part is that it only took about 15 minutes after it was all said and done!  Allow me to explain...

Here's a photo showcasing an area of our living room that I liked to ignore.  We have this little dinky bookcase that is crammed full of stuff and is falling apart.  


You see, ever since we moved into our house, Adam and I have talked about wanting to add more shelving in our living room.  The bookcase we have doesn't come close to containing all the books we have and it is falling apart.  We have discussed several options over the years but never seemed to come up with a solution.  We tossed around the idea of adding built-ins on either side of the fireplace, but decided they would make that wall too overwhelming.  So, we settled on making our own custom bookcase that would fit between the fireplace and the wall.  However, this project has taken a backseat to some of the other projects we've worked on over the years.

In the meantime, I've haven't paid much attention to the bookcase.  I just keep stuffing books, photo albums and knick-knacks on those teeny shelves.  I even started stacking books next to the bookcase!  

I looked over there the other day and thought to myself, "This is ridiculous!  There's no reason for that wall of our living room to look so janky."  So I decided to do something about it, even if we're not quite ready to start building the new bookcase.  

I realized that I don't need to keep every single book we own on that bookcase.  I can store some books in the basement until we build a bookshelf that can house all of our books.  With Young House Love's recent built-in bookshelves serving as inspiration, I sorted our books into colors.  From there, I put like-colored books next to each other and added in a few decorative items.   


I even threw in a few holiday items like the blue snowman and a snow globe.  It's safe to say it looks a million times better! 


Even though the bookshelf is still too small for the space and it's still a little rickety, it looks far more pleasing to the eye and is way more organized.  And I'm not ashamed to show you what's lurking below our vacation gallery wall now.  By doing this project, I realized I should accept and love what I have at the moment, even if it's not my ideal situation.  I can apply this lesson to my life, as well.  Hooray for decorating (and life) epiphanies!  

Thursday, November 10, 2016

Our Shed Is Shaping Up

Adam and I have lost track of the number of times we've been to Home Depot since the beginning of the shed project, but it's safe to say we make it there at least a couple times a week.  Most of the time Adam goes on his own, but sometimes Jazzy and I join him.  We're not super helpful when we go along, but we do manage to take lots of adorable selfies.  


Jazzy loves coming along.  I think she even knows what we mean when we ask her if she wants to go to Home Depot.     


It's also pretty entertaining to see how many large quantities of lumber and other materials we can fit in our cars.  We end up with all kinds of configurations, like Adam hanging onto a bunch of lumber so it doesn't end up getting stuck in the steering wheel.  


Enough about Home Depot, let's get back to the shed.

The next step was to work on the roof.  I helped Adam cut the felt paper to size and get it onto the plywood roof.  Felt paper goes underneath the shingles and acts as a moisture barrier between the plywood and the shingles, just in case any water gets past the shingles.     


Once the felt paper was nailed to the roof, it was time for shingles.  Adam did lots of research and watched lots of videos to figure out how to attach the shingles.  There are different kinds and different installation methods depending on the type of shingles you get.  You have to get starter shingles to go around the perimeter of the roof.  While Adam was nailing in the starter shingles, I was handing them up to him as he needed them.  I noticed on the package it said something about tearing them in half.  If you've ever completed a house project with someone else, it's inevitable that you will end up in our situation. One person realizes that the other person is doing something wrong.  You then have to decide if you should just ignore that fact and keep going or if you should say something and risk upsetting the flow of the project. Knowing that Adam is the definition of a perfectionist, I decided to mention to him that we weren't following the directions correctly.  

After some cursing and having to undo work that had already been done, Adam got all the shingles installed.  I must say, the roof looks pretty darn professional.  


Next came installing the remaining two windows.  I helped out with this and was surprised at how easy it was and how fast it went.  It's definitely a two-person job since you need someone on the inside to shim it up and someone on the outside to hold it in and screw it into place.  By the way, that black tape is some sort of moisture barrier stuff that helps keep moisture out.  Eventually, Adam will put trim up around the windows to cover it up. 


Now that all three windows are in place, Adam started to hang the cute miniature shutters!  He recreated the cedar shutters from the front of our house in miniature form.  It's just one more way to help dress up the shed and make it look more presentable.  There will also be trim above the window to cover up the black moisture barrier tape and a window box below that I'll be able to plant flowers in.  How cute will that be?!    


Since we plan to keep things like the mower and wheelbarrows in the shed, we needed to have a ramp to easily get those items in and out of the shed.  Adam decided to use some concrete blocks to make a base for the ramp.  He dug out space for them and made sure they were level.  From there he used some boards to create the frame of the ramp.  The next step is to get some decking boards to put on top.  


Adam also started to put up some of the trim on the shed.  He plans to add trim where he had to join pieces of the siding together to cover up the seams and along the edges.  The trim will help add a little more character to the shed in addition to covering up the seams and raw edges.  Once all the trim is up, we'll touch up the siding paint and paint all the trim white.  


It sure is shaping up!

Tuesday, November 8, 2016

Decorating With Jazzy In Mind

It's no surprise that Jazzy is a hugely important part of my life.  So it shouldn't shock you to find out that many of my home decor decisions are made with Jazzy in mind.  Allow me to share some examples in case you have a four-legged family member to keep in mind too.  

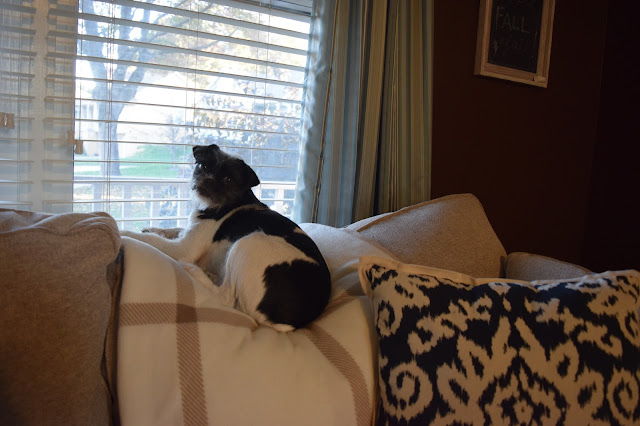
Jazzy has claimed several spots around the house as her own.  Adam and I don't really have a say in which spots she has decided are hers, so we just have to decorate around them.  One of Jazzy's favorite spots is the couch cushion in front of our window.  She picked out this spot when we bought our sectional.  We thought it was cute and didn't really think about what it might mean for the sectional.  Fast forward a year and we now have a permanently-stained, dented cushion.  While Jazzy stays pretty clean most of the time, the top of the cushion where she lays now has a stain on it.  I guess it's from her body oil? Regardless, I haven't found a way to get rid of it.  I can take off the cover and have tried to wash it, but haven't had any luck with removing the stain.  


Enter the throw blanket!  A blanket causally thrown over the cushion adds a little touch of charm while also covering up the Jazzy-shaped stain on the cushion.  Problem solved!  


Jazzy has also taken over our bedroom, in addition to the living room.  She likes to jump up on our bed and sleep on our pillows.  This means I have to put a clean pillowcase on my pillow on the days she picks my pillows.  Instead of telling Jazzy she can't get up on our bed, we have simply chosen to make it easier for her to do so.  You see, our bed is pretty high up and it's a big jump for Jazzy's little legs.  We didn't want her hurting herself while jumping up or jumping down, so we decided to get a bench for the front of the bed to serve as a step for Jazzy.  (I realize we are ridiculous.)  After searching for the perfect bench in the right size, I came across one at Kirkland's.  It was on sale and I opted for the pick up in store option to prevent paying for shipping.  Long story short, it turned out to be a huge hassle and took a month to make it to my house.  The customer service folks I spoke with weren't super helpful either.  If you like the bench, I'd definitely suggest buying it directly from the store.  But I do like it, it's the perfect size and it provides a nice step down or up for Jazzy.  


It's also been a handy seat when putting on socks and a nice perch for the laundry basket when I'm putting away laundry.  So while it was mainly for Jazzy, I get some perks out of it too.  


The final Jazzy-inspired decor item I'll share with you it her giant basket of toys.  It's a bit ironic that Jazzy has a whole big basket for a bunch of toys she rarely plays with.  She'll occasionally play tug of war with her toys if Adam or I instigate playing with her.  But she's never started playing with one of her toys on her own.  Nevertheless, we have a bunch of toys for her.  And we keep them in a tall basket in our living room.  Along with housing Jazzy's toys, it also covers up an outlet and helps fill the open space in front of the sofa table Adam built.  


Is Jazzy spoiled or what?!

Sunday, October 30, 2016

Siding and A Window and Plywood Roofing, Oh My!

Time for another shed update!  Adam has been plugging away at our adorable shed.  It's looking cuter and cuter with each new addition!  Here's what it looks like now:   


As you can see, Jazzy is also a fan.  Since we last caught you up on shed progress, Adam has added siding, installed one of the windows and added plywood to the roof.  The siding matches the siding we have on our house, so the two will tie in together nicely.  It came primed, but it is actually pretty close to the color of our house.  After we caulk up all the screws and any gaps and add the trim pieces, it will be ready for its final coat of paint (or two, depending on the coverage.)  


One of the windows has been installed.  They really help the shed look much nicer and more like an extension of our house.  They even have a screen on them and can be opened up.  Adam made sure to install them so that moisture will stay out and prevent any sort of water damage or rot.  


Adam also managed to put plywood on the roof.  This will become the base for the shingles.  We decided finding shingles that match the ones on our house will also help make the shed a little bit fancier.    


It is certainly coming along nicely!  I might just have to move in once it's all complete.  Look at that view!


Check out all the other shed updates here, here, here and here.  

Saturday, October 29, 2016

Mums

Mums are synonymous with fall to me.  So whenever fall rolls around, I always pick up some mums to plant in the big pot in the front of our house.  Mums are super hardy, so they can withstand cooler temperatures.  They also come in lots of pretty colors.  Last year I went with bright yellow.  But this year I picked out some pinkish-purple ones.  


They always seem to do very well in this location.  I make sure to water them at least every other day and they get to soak up the morning sun in the front of the house.

In addition to adding some cheer to the outside of our house, I also use mums to brighten up the inside of our home.  Mums last for a long time after they have been cut.  So I sprinkle them throughout the house.  I stick some in my nightstand caddy.    


I fill up the mason jar centerpiece on the dining room table.  It adds some nice fall charm while we're eating dinner.  At least on the rare occasion we eat dinner at the table instead of in front of the tv.    


I also added a small little bouquet of mums in our half bathroom.  It ties in nicely with the Mrs. Meyer's mum-scented hand soap I recently found at Target.  


I've had the mums in our half bathroom for over a week now and they are still going strong.  When they eventually do bite the dust, I can always cut some more from the pot out front.  I spent six bucks on the mums for the pot, which is pretty inexpensive.  Especially when you consider all the different ways you can decorate with mums inside your home.  

Friday, October 28, 2016

Bummer

Our sixth IUI did not do the trick.  Jazzy and I are bummed about it.  Adam is bummed about it.  We are all just plain bummed.    

  
Adam and I are going to take some time to decide which steps we want to take next.  However, we so appreciate all the kind words, happy thoughts and sweet prayers everyone sent our way in hopes that the IUI would work.  We thank you from the bottom of our hearts.  

Tuesday, October 25, 2016

Jazzy Goes to the Vet

It was time for Jazzy to get her yearly shots and checkup, so Adam and I took her to the vet.  I think I might be more scared of the vet than Jazzy.  I'm always afraid they are going to find something wrong with her.  That's why I make Adam go with us.  


Jazzy was a very good girl during her trip to the vet.  She didn't seem to be as nervous as she usually is. She typically starts shaking and won't leave our laps.  But this time around, she seemed to be cool as a cucumber.  She even sat by herself at one point.

It also surprises me that she never barks at any of the other dogs in the waiting room.  There must be some sort of doggy code that they all agree to.  They seem to agree that they are all in the same boat while waiting for the vet so they decide not to hassle each other.  

Once Jazzy's name was called, she got weighed before we went to the exam room.  She was down a pound, which is good news.  All her walks must have helped out!  

Then we got to wait for the vet to come in.  While we were waiting, a vet tech came to trim her nails while we were waiting.  It still baffles me that it takes them about two minutes to trim her nails.  The one time Adam and I tried to cut her nails, we spent about thirty minutes wrangling her and only got two nails cut!  That silly little girl.  She has us fooled.    


After her nail trim, she came back to the exam room and felt it was time to go.  She waited very patiently by the door. 


Unfortunately, she had to wait around for the vet to administer her yearly shots.  The shots were a breeze for Jazzy.  She didn't even flinch or act like she even felt the needles! 

Once the shots were out of the way, the vet gave her a quick checkup.  He pointed out her heart murmur. We've known that she has a heart murmur, but luckily it hasn't seemed to slow her down at all.  She goes on two walks a day, a run in the evening and will play with us in between.  This particular vet we saw seemed to be a bit more concerned than the other vets we've talked to in the past.  He pointed out that heart murmurs can lead to breathing difficulties and suggested we go visit a cardiologist if we had the means.  I don't even want to think about what it would cost for a visit to the cardiologist.  Since Jazzy hasn't shown any concerning behaviors or side effects, we decided to hold off until it becomes necessary.  

The vet also pointed out that her teeth have gotten some more tartar growth since her teeth cleaning.  I hated making Jazzy do that since they have to put her under anesthesia.  That's definitely not good for her heart.  But neither is plaque.  So we have decided to hold off on getting her teeth cleaned by the vet and just focus on brushing her teeth more regularly at home.  

Adam has kindly accepted that job.  Jazzy seems to like it when he brushes her teeth more so than when I do.  The two of them seem to have a system down.  It looks a bit like torture for both of them while it's going on, but they get the job done.  So now Jazzy gets a daily teeth-brushing.    


Other than her heart murmur, Jazzy is doing great!  She's a healthy, happy little dog.  And Adam and I are so incredibly lucky that she is our dog child.    

Thursday, October 13, 2016

Ding-Dong

When Adam and I were installing the cedar shutters to the front of our house, Adam pointed out how cruddy our doorbell button was looking.  


I hadn't even noticed until he pointed it out, but he was right.  The plastic was yellowing and a crack was starting to form on the part that you push to ring the doorbell.  It never crossed my mind that you could replace a doorbell button.  It turns out that it is a very simple project and can add a lot of charm to the front of your house.
I learned a couple things about shopping for replacement doorbell buttons.  One thing is that the distance between the screw holes can vary.  We initially bought one at Lowe's, but had to return it because the distance between the screw holes didn't match up to our old ones.  If you are adding new holes, this doesn't matter.  But we wanted to use the anchors that were already in our brick instead of filling in the old holes and drilling new ones.  So my advice would be to figure out what measurements you need before you go shopping and to bring along a tape measure.

The second thing I learned is that some doorbell buttons have parts that stick out on the back.  I picked one at at Home Depot, but realized I will have to return it as well because the back of it stuck out too much.  I finally hit the jackpot with a flush mount doorbell button from Ace.  I tried to find it on Ace's website, but couldn't.  Here it is on the manufacturer's website.      

I liked the bronze finish.  The shape seemed a bit fancier and would fit in with the front of our house. Since our previous button was hard-wired, we needed to make sure we selected a wired button.  Some doorbell buttons are battery-operated.  You just have to remove your old doorbell button to find out.

Adam was going to replace the doorbell button, but he had to work late.  I thought to myself, this can't be that hard.  So I went for it.  

I knew enough to make sure I turned off the breaker that controlled the doorbell button.  It was a bit tricky figuring out which was the correct breaker.  The labels weren't all that helpful.  I tried a few random ones first, with no luck.  So then I went about it with a more systematic approach.  I started at the top left corner and worked my way down.  I didn't find the correct breaker until halfway down the right side.  


To make things more fun, Jazzy barked each time I rung the doorbell to see if I had cut off the power to it.  So things went like this:  Go downstairs, flip a breaker, go upstairs, ring the doorbell, listen to Jazzy bark, go back downstairs, flip a different breaker, go upstairs, ring the doorbell, listen to Jazzy bark, and so on and so forth.  I certainly got my exercise!   

Once I had the correct breaker flipped, I unscrewed the old doorbell button to see what I was working with.  There were two wires attached to two screws.  It didn't appear to matter which screw went to each wire after carefully reading the instructions on the back of the doorbell button.  So I unscrewed the screws until the wires were released.  I then attached the wires to the screws on the new doorbell button.    


From there, all I had to do was screw the button into the anchors that were already in the brick.  It was as easy as that!  I was pretty proud of myself for tackling this project.  I was a bit daunted by doing something electrical without Adam looking over my shoulder to make sure I was doing it right, but I'm so glad I tried it!  It was simple and I feel pretty darn accomplished.   


After it was all screwed in place, I flipped the breaker back on to make sure it worked.  It lit up and rang like a champ when I pushed it!  


While I don't plan to tackle any complex electrical plans in the near future, I do have a little more confidence under my belt to try even more new things.  I try to be a good role model for Jazzy. Unfortunately, I think she was more enamored of Bob mowing his lawn across the street than my lesson to try new things.  Oh well.