Wednesday, July 27, 2016

Things to Consider When Visiting an Infertility Specialist

Over the past three years, I have seen more medical professionals than I have in my whole life put together!  I've gotten pretty good at being a patient, though.  So I thought I would share a few things to consider if you are getting ready to visit an infertility specialist for the first time.  

Ask someone to come with you.

Whether it's your first visit or your tenth, it's always nice to have someone come with you.  Not only can they offer you support, but they can also be an extra set of ears.  I am very lucky that Adam comes with me to most appointments.  I've also had my mom come with me from time to time.  Close friends or other family members would also be good options.  Sometimes it's scary to have to hear what they have to tell you, so it's nice not to be alone.  And there have definitely been things that I have missed or forgotten a doctor has said.  Someone else might also think of different questions to ask.    

Create an infertility timeline.

Each doctor that I have visited has asked me to complete a health history.  When you've had infertility issues as long as I have, there are a lot of dates and surgeries and procedures to remember.  And after awhile they start to get a bit fuzzy.  So I started an infertility timeline.  It's just a Google doc that has all the specific dates of the different procedures and surgeries I've had.  That way, I don't have to look back at old calendars or paperwork when trying to fill out health histories.  I have all the important dates all in one place.  

Bring any paperwork and test results you have.  

Any good doctor should request records from other doctors and specialists you have seen in the past.  But sometimes that takes some time and records might be incomplete.  I have a file of all of my medical records and test results that I keep handy.  I always bring all the paperwork I have with me so they can make copies.  A lot of times it's documentation they already have or will get from my other doctors.  But I would rather them have duplicates as opposed to missing information.  


Research with caution. 

There's a lot of scary stuff out there on the internet, especially when it comes to infertility.  That's why I warn you to research with caution.  I do think it's important to be knowledgeable about different conditions and treatment options.  But there is such a things as reading too much and finding all kinds of things to worry about.  I recommend looking at reliable sites like reproductivefacts.org to answer questions you might have and get a good basic understanding of infertility issues.  But try to stay away from message boards.  They tend to be a breeding ground for complainers and negativity.  
  
Don't be afraid to ask questions.

There is so much information thrown at you when you speak with infertility specialists.  There are also a crazy amount of acronyms they like to throw around.  AMH levels, HSG tests, SHG tests, IVF and IUIs.  It can get pretty confusing.  So don't be afraid to admit you don't know what the heck they are talking about. A good doctor should make you feel comfortable asking questions and should take the time to explain them in a way that makes you understand the answers.  And ask all the questions you have.  Don't worry about asking too many or taking up too much of their time.  When they are meeting with you, it's their job to make you their one and only focus.  

Ask how much things will cost.  

There are lots of different tests and procedures available.  Some are relatively inexpensive or even covered by insurance, like simple blood tests.  Others are astronomically expensive and all out of pocket. When a doctor recommends a specific test or procedure, make sure you ask how much it costs.  It's not a bad idea to get it in writing, especially when insurance companies get involved.  Dealing with infertility is hard enough, you don't want to be surprised by a hefty $1,500 bill for chromosomal testing when you were told it would only cost $99.  (I speak from experience.)  


I hope these tips will help you be more organized and prepared for a visit with an infertility specialist.     

Saturday, July 23, 2016

Nightstand Caddy

I've been on the hunt for something to house my cell phone while it's charging at night.  I wanted it to look pleasing to the eye and also to solve my problem of having to crawl around on my hands and knees to look for the charger cord underneath my nightstand each night.  I hadn't had much luck, but I hit the jackpot the other day at Michael's.  I found a charming little wood caddy.  It is wooden with chalkboard rectangles on each side.  I'm not quite sure what the official purpose of this piece was, but I knew it would be perfect as a nightstand caddy.    


In order for my phone charger cord to go in the back of the caddy, I asked Adam to drill a hole.  He drilled a hole that allows the charger cord to pass through, but is very snug.  This keeps the cord from falling out of the caddy.  I'm so happy I will know exactly where my cord is each night instead of trying to find it behind my nightstand.    


I couldn't figure out what to add to the chalkboard label on the front, so I just went with a "Bunch of Stuff" label.  It does describe what's going on inside the caddy.  I used a chalk marker to write on the label.   


Now my caddy was ready for its "stuff."  One compartment houses my cell phone.  Another holds hand lotion and lip balm.  (I always seem to realize I need lip balm or that my hands are dry as soon as I lay down in bed.)  A third compartment contains a notepad and pen. (I don't know about you, but I always think of things I need to do or remember when I lay down.  Now I don't have to get out of bed to write them down.)  The final compartment houses a juice glass with some fresh flowers.   


I love the roominess and versatility of this caddy.  Plus, I can easily switch out the items.  And it does what I hoped it would- charge my cell phone in a cute, organized way.  


Wednesday, July 20, 2016

Jazzy Gets Jazzier

Jazzy wanted to add a little more pizzazz to her look.  I told her I would be more than happy to help her out.  Jazzy doesn't really care for wearing much more than her harness.  However, she didn't mind wearing the bandanna that the gals who give Jazzy her haircuts put on her the last time she went.  


So I told Jazzy that I would make her another bandanna to wear since her Easter-themed one doesn't fit the season.

I have lots of fabric scraps leftover from other projects.  I let Jazzy pick out which fabric she liked best. She picked out a cute polka dot pattern.    


Once she had her fabric picked out, I made a pattern that I could use to help me cut out the shape of the bandanna.  It is basically a v-shape.  The distance between the two ends is Jazzy's neck measurement (12 inches) plus 8 inches to allow for a knot to be tied.


I placed the pattern on the fabric and pinned it in place.  From there, I cut around the pattern with pinking shears.  Using pinking shears will help keep the fabric from unraveling.  


The only thing left to do was tie the bandanna around Jazzy's neck.  She felt very fancy wearing it and was more than happy to model it for me.  


I'm sure your pet would enjoy a bandanna just as much as Jazzy enjoys hers!  Plus, it's a great way to make use of all those fabric scraps.    


Jazzy was such a good model it was hard to narrow down which photos to use in this post!  So here's one more, just for good measure.  I love that sweet face!  


Tuesday, July 19, 2016

DIY Cedar Planter Box

Adam and I decided to build a cedar planter box to house an herb garden.  We love to add fresh herbs to our meals and beverages.  So we got to work creating the perfect little herb garden.  

I thought I'd share the process we went through to build our planter box in case you'd like to whip one up on your own.  It was a relatively simple project and didn't take too much time.  

Step One: Decide on the Size and Location of Your Planter Box

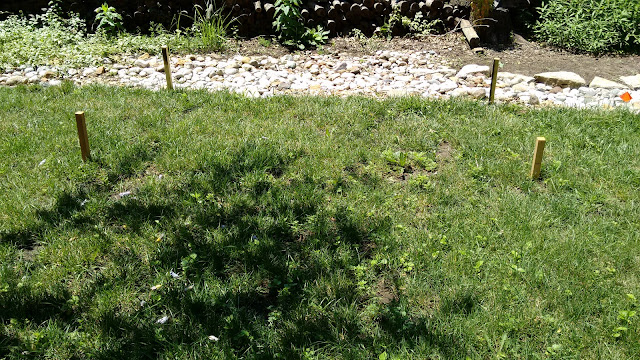
The first thing you'll want to do is to decide where you want your planter box to go.  Think about what you plan to plant and then determine the best position.  Since we planned to plant herbs, we picked an area that would get full sun for the majority of the day.  We used some stakes to help us get a sense of what size we wanted to make ours.  We decided to go with an 8-foot by 4-foot box.  


Step Two: Gather Your Supplies

Once you know where you'll be putting your planter box, you'll want to gather the supplies you'll need to build your planter box.  

Here's what you'll need to make an 8-foot by 4-foot planter box:


- Four 8-foot cedar* 2x6's
- Four 4-foot cedar* 2x6's
- Four 4-foot cedar* 2x4's
- Four cedar* stakes
- Cedar* corner pieces (optional)
- Wood glue
- Deck screws
- Drill(s)
- Clamps 
- Mallet 
- Garden soil/compost
- Herbs 

*Make sure you get untreated lumber if you plan to plant vegetables or herbs.  You don't want any chemicals leaching into anything you might eat.  

Step Three: Attach the Framework of the Planter Box 

Our planter box consists of two frames stacked on top of each other.  So, we assembled each frame separately.  We laid everything out ahead of time so we had an idea of what the finished frame would look like and to make sure all of our cuts were accurate.  We used two 8-foot cedar 2x6's for the long sides and two 4-foot cedar 2x6's for the short sides.  For some extra stability, we added two 4-foot cedar 2x4's in the middle of the frame.
   

Adam has some handy assembly squares that we used to make sure the corners were 90 degrees.  We used clamps to hold the wood against the squares.  Making sure everything lines up will ensure the finished product looks its best.  Don't be tempted to skip this step, like I was.  If we had, the planter box probably would have ended up all wonky.  Good thing Adam was around to make sure we didn't miss this step.     


Now, undo all the clamps.  I know this seems counter-intuitive, but you'll have to undo the clamps so you can use wood glue to help keep all the wood together for the long haul.  You could step the glue step and just use screws, but we didn't want this moving or shifting over time.  So we glued together the outside frame for some added strength.  We stuck a little piece of foil under the area we were gluing so the glue wouldn't adhere our frame to our wood deck.   


After you glue the outside frame together, put the clamps back on the frame.  These will help hold the wood steady when you screw the pieces together.  You'll want to add three screws to each corner, as shown below.  We pre-drilled the holes to help prevent any splitting.  It's super handy if you have two drills for this step.  I pre-drilled the holes and Adam followed behind to put in the screws.    


After we got the outside frame all assembled, we added two 4-foot cedar 2x4's to the center.  These act as extra bracing and help keep the outside frame a perfect rectangle.  We opted to just screw in these boards and skip the gluing step.  

Jazzy did a fantastic job supervising us.  She was kind of a perfectionist, though.  She was not very happy that we skipped the wood glue on the center braces.    


Now you get to repeat the process with the second frame.  It will go a bit quicker since you know what you're doing now.  

Step Four: Prepare Your Yard for the Planter Box

Once your frames are built, you'll want to prepare your yard for the planter box.  We were putting our planter box on a slope, so we (really, it was just Adam) had to dig out some of the yard to ensure that it would be level.  You want your planter box to be level so the water drains properly.  You'll also want to remove any grass or weeds from the area since there is no bottom.


Next, you get to put the frames in their new location.  We stacked the two frames on top of each other. You might notice some cedar corner pieces in the photo below.  Adam had some extra cedar pieces, so he cut a 45 degree angle on each side and attached them to the corners with screws.  This is just one more step you can take to help keep the frames stable, but isn't necessary.  If you can't tell by now, Jazzy learned her perfectionism from her daddy.    


Step Five: Secure the Planter Box to the Ground

Now you'll want to make sure your planter box doesn't move around on you.  To do this, beat down some cedar stakes to the inside corner of the frames with a mallet.  Keep on hitting them until they are flush with the frame.  


Once the stakes are flush, attach the frame to the stake with screws.  You'll want to screw both the top frame and the bottom frame to the stake.  This will ensure the frames stay not only together, but in their location.  


Step Six: Fill in Your Planter Box with Soil/Compost 

It's time to fill in your planter box now!  Adam did some very complicated math involving cubic feet to determine how many bags of soil and compost we would need.  I'm not quite sure how he figured it out, but I'm glad he knew what he was doing!  We ended up using a mix of Vigoro Organic Garden Soil and Miracle-Gro Nature's Care Organic Raised Bed Soil

Step Seven: Plant What You Like! 

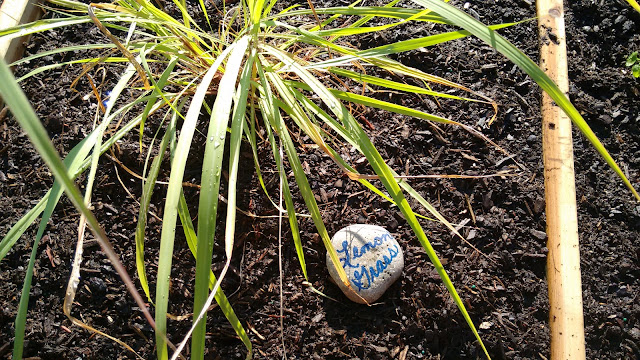
Here comes the fun part- planting your plants!  We struck out at Home Depot when looking for herbs. They didn't have hardly any herbs left.  But we found some at a local nursery.  We planted some lemon grass to help keep the mosquitoes away.  We also planted some basil, cilantro, chocolate mint and mojito mint.  


Step Eight: Add Plant Markers

I used my handy trick for labeling what I planted.  All you need is a few flat rocks, a paint pen and some clear protective spray paint.    


Now you can sit back and wait for your herbs to grow!  Even though it's late in the growing season for Missouri, I think we'll still be able to enjoy some fresh herbs in no time.  


Good luck if you plan to make a planter box of your own!  

Saturday, July 16, 2016

A Very Sexy Shelf

That's right, our dining room just got a very seductive addition.  I never thought a shelf could be described as sexy, but that's the best way to describe Adam's latest project.

The project turned out much different than our original plan and there were a few snafus along the way. Originally, we thought we wanted to get a slim buffet table for our dining room.  Our dining room is pretty tiny, but we thought we could squeeze in a narrow buffet table.  It would give us a little extra room for food dishes during parties and get-togethers, plus give me some more room to put pretty decor items. 

Adam said he could build one for me.  After seeing the beautiful work he's done on other projects (like the sofa table, plant stand and bathroom shelves, just to name a few) I knew whatever he would build would be gorgeous.

So, we set out to find the perfect piece of wood for the table top.  We wanted something with some character, so we checked out a few different specialty wood shops.  Eventually, we found a stunning piece of curly cherry wood.  It had pretty wood grain and I loved that the edge was rough.  


We brought our new piece of wood home.  The next step was to figure out what kind of legs we wanted to attach to the wood.  We decided that black wrought iron hairpin legs would be perfect.  There were a few vendors we looked at, including some through Etsy.  But a problem arose.  The brackets that would attach to the bottom side of the wood would be too big for our narrow piece of cherry.  Dang!  

That meant we had to go back to the drawing board.  Our new thought was to attach the wood the wall with some sort of bracket at the same height a buffet table might land.  We searched around for some cool brackets.  I stumbled upon this picture and thought the brackets were super cool.  I followed the source of the brackets back to an Etsy shop.  While they are awesome, they were also expensive.  I showed Adam the picture even though I'd already decided they were too expensive.  Adam surprised me by saying those were just something called turnbuckles and you could get them at Home Depot for a couple bucks!  


So we now had a new direction with our project.  We went to Home Depot and picked out some turnbuckles.  They were shiny silver, but a few thin coats of oil-rubbed bronze spray paint gussied those turnbuckles right up!  


With our hardware problem solved, Adam got to work preparing the wood.  He sanded the wood down so it was smooth.  Then it was time to pick out the perfect stain.  Adam has amassed quite the collection of wood stains, so we had lots to choose from.  We wouldn't need the whole length of the board, so Adam used the end piece he cut off to test out the stains.  He used some painter's tape to label each stain so we would know exactly what we were looking at.  Luckily, we both picked the same stain option as our favorite.  We liked the far right stain (Minwax Gel Stain in Aged Oak) because it was light enough to let the wood grain shine through and would look good with the rest of the wood tones in our dining room.        


After staining the wood, Adam put three coats of General Finishes Arm-R-Seal Topcoat in a semi-gloss finish on the wood so it will be protected.  Look at how glossy and gorgeous that piece of wood is!  


Now it was time to add the turnbuckle hardware.  Adam used his measuring skills to attach three turnbuckles.  He was able to do this step pretty quickly and without much trouble.  The next step, however, caused a big headache. 

Figuring out how to attach the hooks that would hold the turnbuckles (and essentially keep the shelf on the wall) was a bit tricky.  First of all, the studs weren't centered on the wall, so there wasn't the option of attaching the hooks straight into the wall.  That meant some sort of drywall anchors were needed. After perusing the selection of drywall anchors at Home Depot and Lowe's, we picked some toggle anchors we thought would be best.  Turns out, we were wrong.  Don't buy them.    


So now we were left with giant holes in our wall.  Grrrr....  


But Adam the engineer and his problem-solving brain came to the rescue!  He found some toggle bolts in the garage that would fit the size of the hole while still providing the stability needed to hold up the shelf.  


He also spray-painted some washers to cover up the non-finished-looking space around the toggle bolts.  It looks like it was meant to be there all along.  

After the headache of figuring out how to attach the shelf to the wall, it was finally time to hang it up. We hung the turnbuckles on the hooks and it worked like a charm.  It looks amazing, as well!  


Adam also added some tiny brackets underneath the shelf that are drilled directly into the studs.  You don't see these, but they ensure that the shelf stays put.  


Once the shelf was in place, I got to do the fun part: adding accessories!  I didn't want to add too much stuff that would detract from the pretty shelf.  So I just added a simple vase with some of my elephant ear plants, a few extra cloth napkins, a dish with some after-dinner mints and a little star-shaped candle. There's still lots of room to add dishes for dinners and parties.  


I am so in love with this new shelf!  It's almost a bit rustic, with the turnbuckle hardware and the rough edge.  But the glossy finish makes it still feel polished and classy.  It really does add some more personality to our dining room.  Another successful project, Adam!  


Thursday, July 14, 2016

Now You See It, Now You Don't

Remember back to this post, when I shared about the problem in our backyard?  We had a very large, circular garden.  It was there when we bought the house and were always a bit perplexed by it.  Why was it a circle?  Why was it so big?  Why was it put in under all the trees so sunlight rarely got to the plants in it?    


We liked the idea of a garden in our backyard, but this wasn't the best placement or design.  None of the vegetables we tried to plant ever grew, while the herbs only had mild success.  We decided to get rid of it and plant grass in its place.  Our plan is to make a cedar planter box on the other side of our backyard that gets more sunlight to house some herbs.

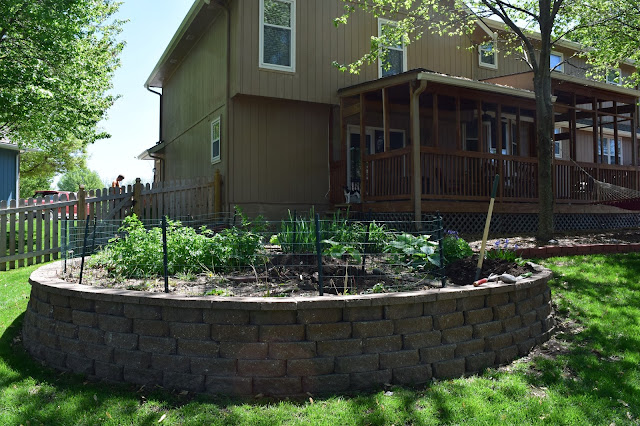
To get rid of that humongous beast was no easy task.  There were a lot of paver stones and dirt to deal with.  We decided to add a retaining wall/planter bed on the side of our house, so we were able to use some of the paver stones, gravel, plants and dirt that made up the circular garden.  That turned out really well and was a pretty inexpensive project since we already had most of the supplies.  


After tackling the new retaining wall/planter bed on the side of our house, we turned our attention to demolishing what was left of the circular garden.  


We decided to add the remaining plants to an empty corner of our backyard.  First, we filled in the low area with some dirt.  


Then, we added in the plants and filled in the area around them with rocks.  We weren't sure if they would survive since we transplanted them in the summer heat.  But we are happy to report the plants are thriving!  


Next up, we had to spread out the mound of dirt that was leftover.  We started by trying to break up the dirt with shovels and a dinky little claw tool, but that wasn't getting us very far.  So we turned to our nice neighbor Willard who owns every tool known to man.  He owns a tiller and was kind enough to lend it to us.  That certainly sped up the spreading-things-out process!  


After all the dirt was spread out, it decided to rain for about a week.  Normally, we'd be thrilled with free water for the grass.  But free water for the dirt just turned into a muddy mess.  Jazzy was especially fond of trotting through the mud when she went outside.  So we decided to try planting grass seed even though it's not recommended to plant grass seed in the summer.  We figured since we have a sprinkler system, we might as well put it to use.  We briefly threw around the idea of getting sod, but that was just too expensive.  Lucky for us, the grass grew!  Our fake owl we named Oscar helped keep the birds from eating all the grass seed.  Good work, Oscar!   


Our yard really does look a lot bigger without the circular garden.  Jazzy has some more room to roam now.  It looks slightly like some sort of burial mound, but the soil should compact a bit more over time.  


We still have a few other projects we want to tackle in our backyard.  We are currently working on the cedar planter box for an herb garden.  Adam has plans to build a shed.  We need to get a portion of fence installed.  (The neighbor's fence blew down in a storm and isn't planning to replace it anytime soon.)  And we have lots of paver stones to get rid of.  Anyone?   

Tuesday, July 12, 2016

$$$

Get ready, I'm about to step onto my soapbox.  The topic: the ridiculous and unfair costs of infertility testing and treatments. 


Unfortunately, this topic is something Adam and I are all too familiar with.  And it sucks.  We are definitely not alone in dealing with infertility.  Infertility affects one in six couples, which equates to about eight million people.*  That is a lot of people.  When Adam and I started to share about our troubles, it was as if people came out of the woodwork to share about their own struggles.  It is incredibly and unfortunately common.
  
The fact that it is so common makes it hard for me to believe that the costs of treatments seem so astronomical.  It feels so wrong for doctors, insurance companies and drug companies to pray on the desperation so many people feel when trying to become parents.  While I realize options like IVF deal with some very cutting-edge technology, it still just seems unfair.

It's equally frustrating that most insurance plans don't cover infertility costs.  Adam and I recently spoke with the financial coordinator at our clinic.  We asked if there were any insurance companies that do offer coverage for infertility costs and she said that most companies do offer plans with coverage.  But they come with high premiums that employers don't want to pay.  

It's no surprise that people have started to get creative with lowering the costs of infertility treatments. When I went to a support group back in May, there was a lady there who went to Greece for IVF because the costs were far less.  I remember thinking she was absolutely crazy, but after hearing the precise costs involved in IVF, I'm not so quick to judge.  But isn't that sad?  That people have to turn to other countries to get affordable treatment?  

Even adoption comes with a hefty price tag.  And even though the costs are so high, sometimes the likelihood of success is relatively low.  It can all be a big gamble.  Many people end up taking out personal loans and doing fundraising.      

The kinds of people who spend thousands of dollars on treatment are the kinds of people who will likely make good parents.  These are people who will do just about anything to start or add to their families. Where is the justice in that?  

But, as I've come to realize and accept, life simply isn't fair.  After talking with a family member who went through IVF, she ended our conversation by saying that she felt lucky that there are options like IVF available.  If we were living even just 40 years ago, we wouldn't have options like IVF.  We would have to accept that biological children just weren't in the cards for us.  When you look at it like that, it helps put things into perspective.

So what's the point of this post?  I am just complaining?  Well, yes, partly.  But I am also hopeful that something positive will come from it.  Here are some things you could do to help.  The next time you see a GoFundMe or fundraising request on your Facebook feed for a friend or family member, consider making a small donation.  I'm sure they would appreciate any amount, no matter how small.  You could also consider writing to your local representative in support of legislation that requires insurance coverage for infertility treatments in your state.  (There are currently only 15 states that require such coverage.**)

Okay, I will get off my soapbox now.  Thanks for listening.      

*According to the Reproductive Resource Center website. 
**According to the Resolve.org website.